Hello all! Me again. Got some partial updates that I want to drop before I get too far back and have to do a mega update with hundreds of pictures. Maybe I could take less pictures? Nah, that wouldn't be as fun... for me... not you...
Anyway, so I'm plugging away on the gauntlets as well as a replacement hat. To start, thank you so much to Mike K (nukem25rs) for his suggestion that I pick up acetone and solvent to work on the ABS. This stuff is magic... well, I'm sure it's science, but whatever. I found this can of stuff at Parkrose:
 20180313_172915
 by
Michael Halstead, on Flickr
With that, I was able to plastic weld all the boxes together. Hit them with some sandpaper to smooth them out and they are ready for the eventual mounting on my gauntlets:
 20180313_174535
 by
Michael Halstead, on Flickr
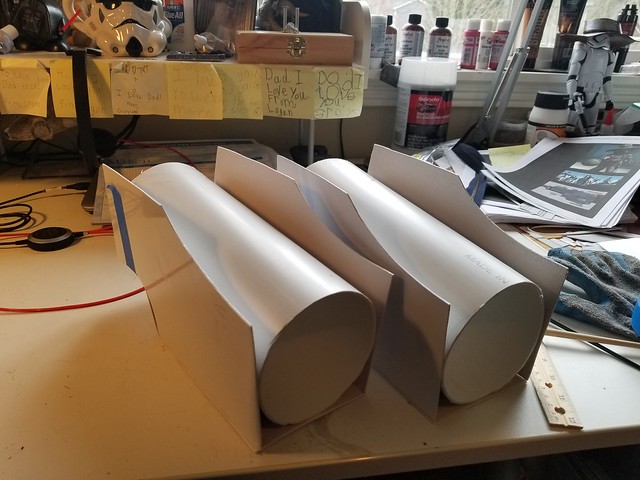
When I left off, I had one gauntlet cut to the rough shape I was going to use and I started to melt the ABS to make the curve that I need at the back. I got additional ABS and repeated:
 20180314_160024
 by
Michael Halstead, on Flickr
I melted all the top corners together so that it would hold and then cut 4" pipe to fit and be the interior support:
 20180315_104257
 by
Michael Halstead, on Flickr
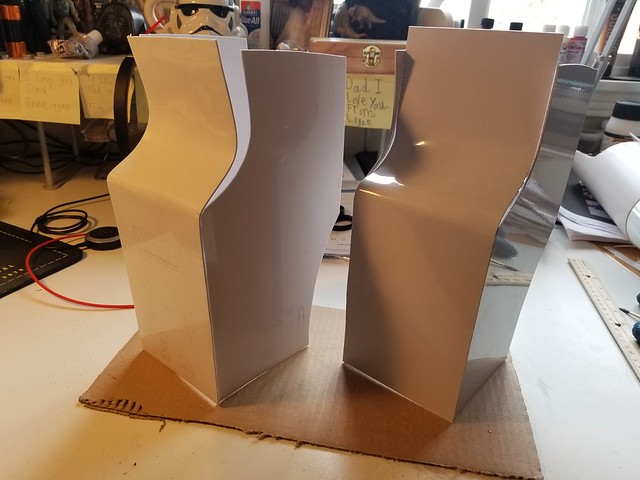
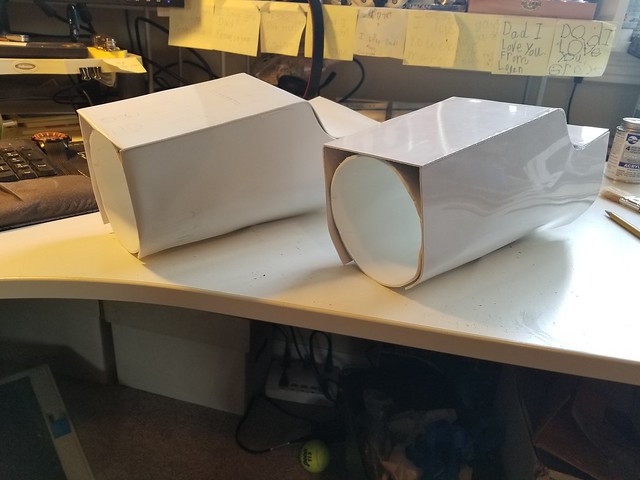
And they ended up looking like this:
 20180315_141518
 by
Michael Halstead, on Flickr
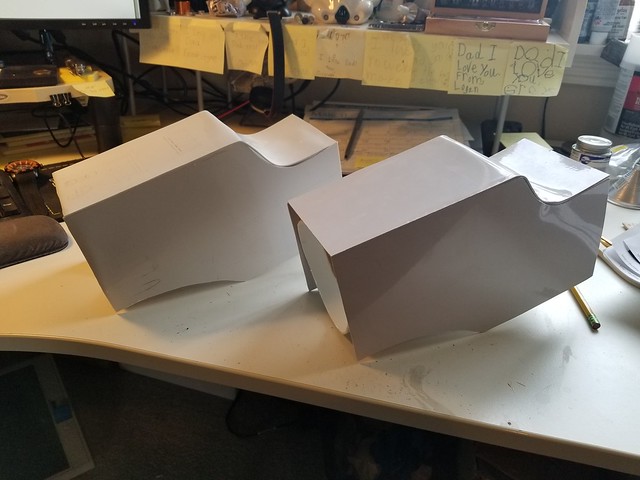
All boxy and gross, but I wasn't quite done yet. I really like my heat gun, so I hit the bottom with it for enough time for the ABS to give up and melted it down.
 20180315_144041
 by
Michael Halstead, on Flickr
 20180315_144058
 by
Michael Halstead, on Flickr
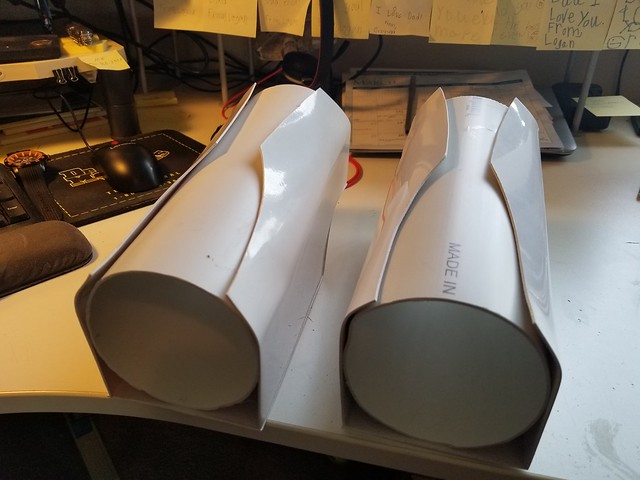
Now they are looking more like Cad's gauntlets. Quick test fit with the previous boxes I made:
 20180315_144724
 by
Michael Halstead, on Flickr
The bottom needs to have an area for the gauntlet dart, so I cut away some additional PVC:
 20180315_152138
 by
Michael Halstead, on Flickr
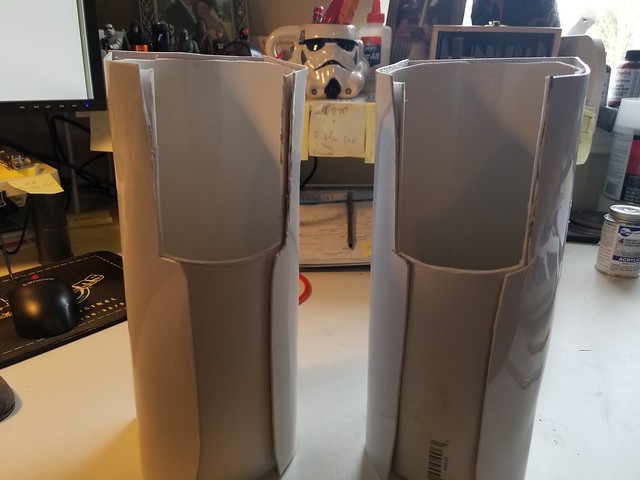
And right now, they ended up like this:
 20180315_152229
 by
Michael Halstead, on Flickr
I stopped for now because I first want to get the wrist cuff piece. I still need to find some plumbing parts to make that and then I need to attach some flat ABS to the bottom front as that spot is flat and where the gauntlet dart will run. The whole front, around the wrist cuff, will have a solid piece of ABS as a cover. Then, I am going to use some foam to build up the bottom back rounded area so that it matches the shape of Cad's gaunts and adds the trim details that are needed. That can be built up to house the gauntlet dart and the hose attachment pieces. All of which I still need to build. So, progress will slowly continue.
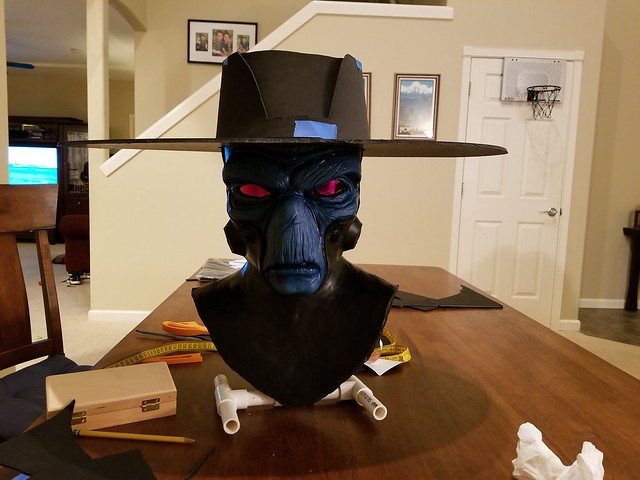
Then, I started working on the hat, so that I can use the Chris Stevens mask. My current hat is made out of foam board, and it's really rigid. I like it, but I don't love it. I started cutting out a new, larger hat so that I can hit my head on every door jam that I get near!
 20180310_175254
 by
Michael Halstead, on Flickr
So, I got it sized about right and cut out the middle:
 20180310_181214
 by
Michael Halstead, on Flickr
Then, I started to build the crown. This is where I ran out of enough large foam that I had to stop progress for now.
 20180310_183507
 by
Michael Halstead, on Flickr
 20180310_190454
 by
Michael Halstead, on Flickr
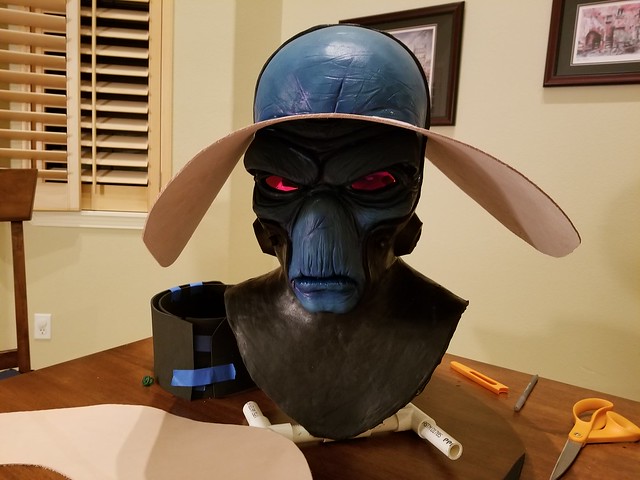
But, like I said, I've been happy with my hat, but I don't really love it. If I'm working towards infamous, I want it to be the best ever. So, I wandered into Tandy Leather and asked about something that could be slightly rigid but also droop some, like Cad's hat does. It doesn't stay completely flat, it droops in the front and back, and I WANT THAT!
They sold me some veg-tan leather. This is supposed to be real flexible and then you submerge it in water and then place it on a form. Once dry, it will stiffen a bit and take on the form you use. Sounded like exactly what I am hoping for because using it just as is, doesn't work:
 20180310_194440
 by
Michael Halstead, on Flickr
So, I have this leather and I certainly don't want to use it without testing it first. That's a large piece and I'm worried that even with it tightening up and gaining some rigidity, it would still droop too much simply because of it's own weight and the size of the piece I am using. So, I decided to do some test pieces first:
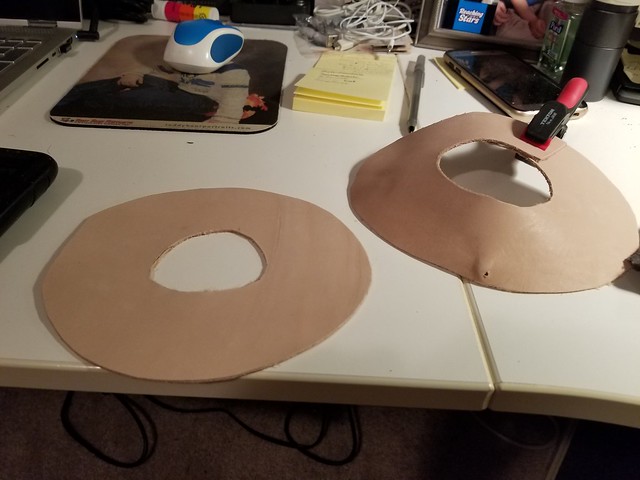 20180310_201008
 by
Michael Halstead, on Flickr
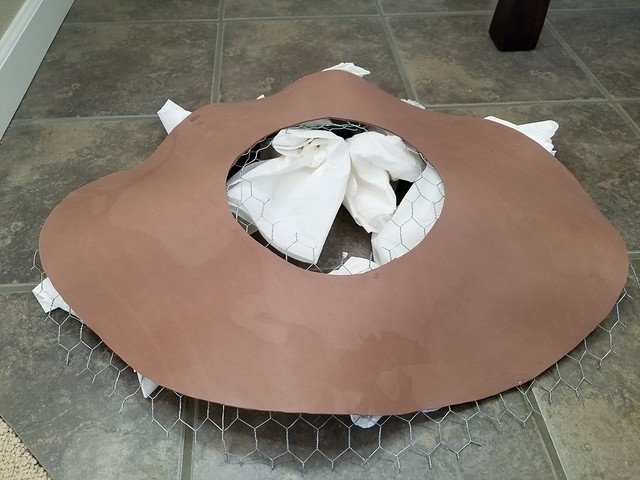
Used chicken wire to create a form:
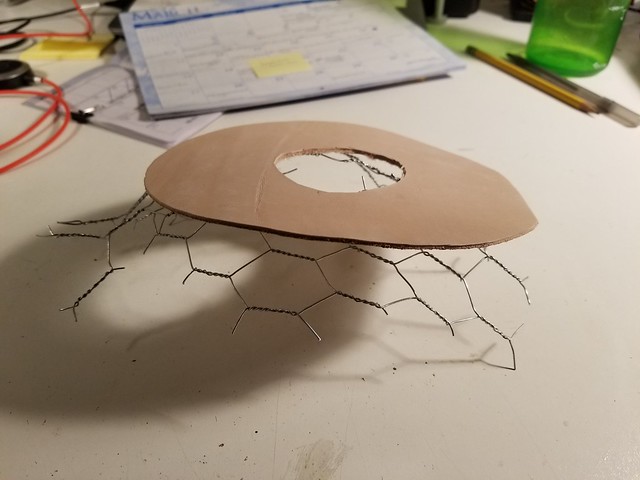 20180310_202005
 by
Michael Halstead, on Flickr
Got it wet and let it sit for the night:
 20180310_202241
 by
Michael Halstead, on Flickr
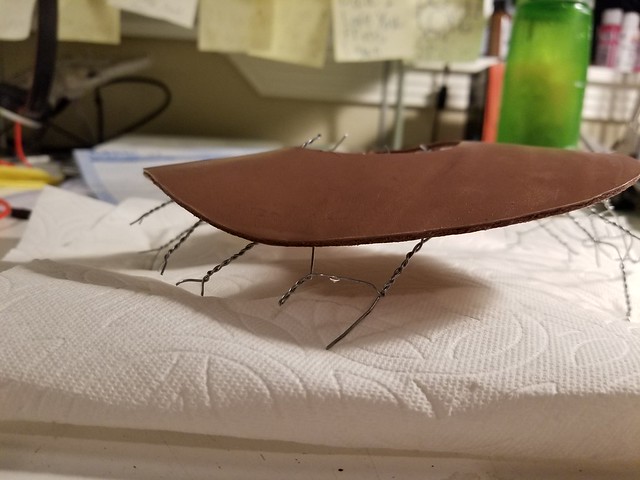
Came back the next morning and I had this, a perfectly rigid, but still somewhat flexible, piece of leather:
 20180311_082529
 by
Michael Halstead, on Flickr
So, I got a bit goofy and decided to just build a mini hat:
 20180311_162841
 by
Michael Halstead, on Flickr
Cat Bane is not amused by your antics!
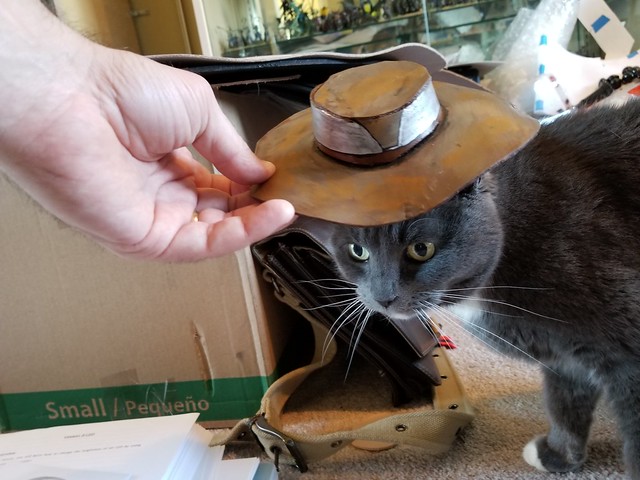 20180311_165119
 by
Michael Halstead, on Flickr
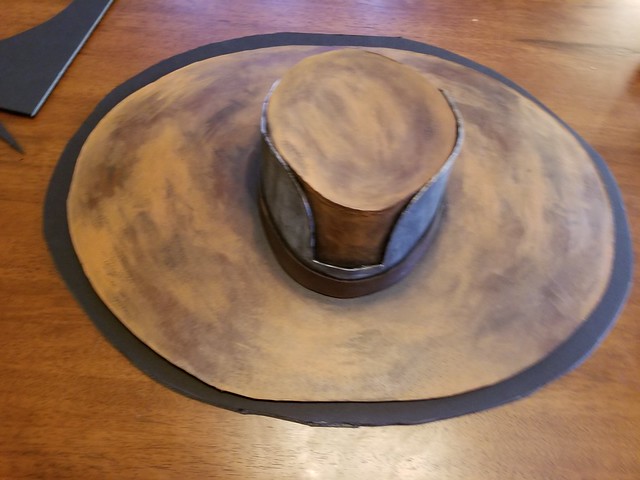
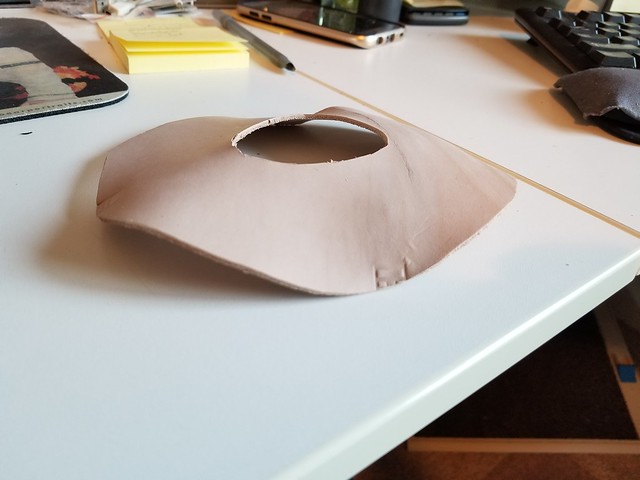
So, it seemed to do the trick, so I went full scale:
 20180311_153337
 by
Michael Halstead, on Flickr
And was a bit disappointed....
 20180312_090111
 by
Michael Halstead, on Flickr
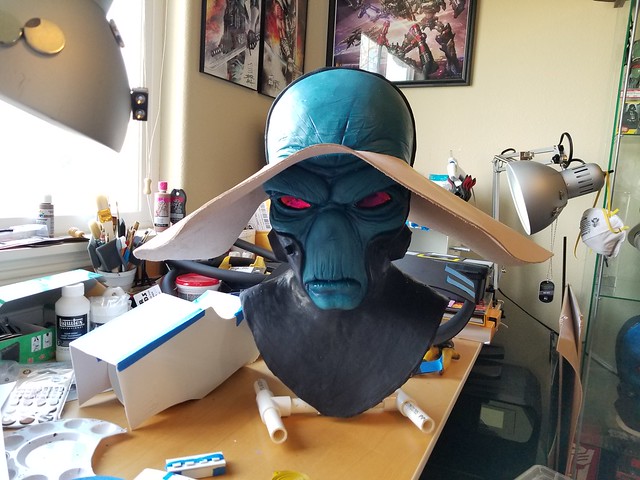
But, the hat will need the crown, so I taped a temporary in place to see if that helps it stay up better:
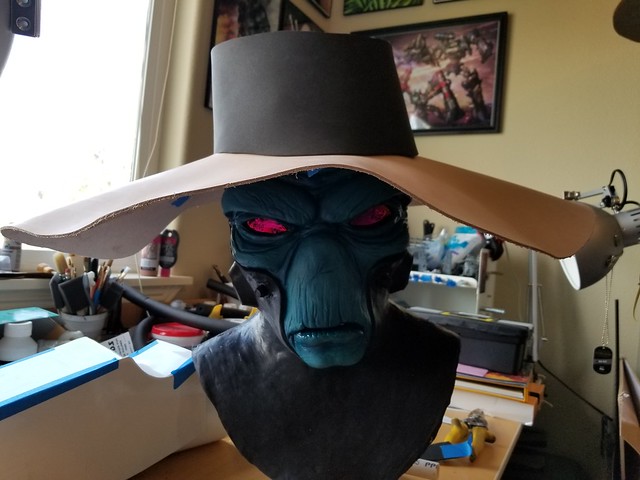 20180312_094834
 by
Michael Halstead, on Flickr
Seems to work a bit better and I like the shape much better than the completely flat board hat. So, I'm waiting for my additional foam to show up so that I can build the crown and glue it all together to see what it will look like. I've toyed with the idea of backing it with some thin wire and then maybe a bottom layer of foam to hide the wire so that it can be shaped better how I want it but I don't want to add too much weight. So, I think I'll get the foam, build what I have and see how it looks. I have enough extra leather to toy with other ideas so I can still try to come up with something.
Anyway, that's all for now folks. Have a great week!


